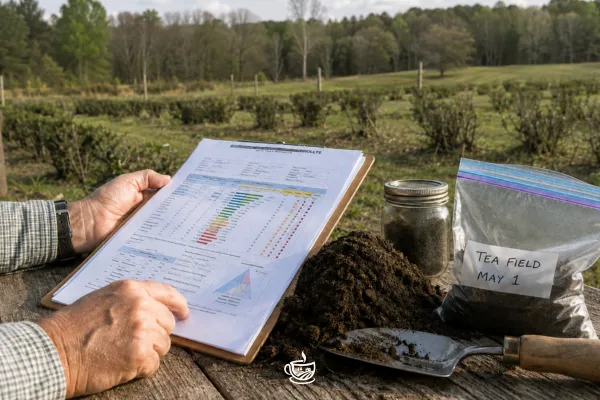
Soil Tests and What They Really Mean
Learn how to read soil test results without overcorrecting pH or nutrients—and discover what that laboratory report cannot tell you.
At Clemson Tea Farm, soil test results can look impressively official: numbers, bars, ratings, lime recommendations, and enough abbreviations to make a gardener wonder whether the dirt has gone to graduate school.
I try to read them like lab work.
A laboratory result matters, but it is not the whole picture. You know, just because a cardiac patient's EKG monitor shows a flatline…. before intervening (aka starting CPR), we check the actual patient first. Likewise, a soil test gives us valuable information about soil chemistry, but before intervening, we assess drainage, root growth, plant response, or the living clues described in What the Earthworm Population Tells Us.
What Does a Soil Test Really Tell You?
Quick Answer: A routine soil test is a chemical snapshot showing soil pH, an index of plant-available nutrients, and crop-specific lime or fertilizer recommendations. It guides amendments, but it does not fully measure structure, drainage, compaction, microbial activity, earthworms, or the soil’s overall biological health.
That distinction can keep us from “fixing” soil that was not broken in the first place.
Why This Matters
Gardeners sometimes see one low bar and immediately reach for fertilizer. Or they see “high” and assume the soil must be wonderfully healthy.
Not so fast.
A nutrient rating tells us whether a particular crop is likely to respond to more of that nutrient. A high rating generally means no additional application is needed. An excessive rating can point toward nutrient imbalance, poor plant performance, or environmental risk.
Meanwhile, chemically adequate soil may still be compacted, waterlogged, bare, biologically quiet, or unable to hold moisture.
A soil test is guidance—not permission to spread everything in the shed.
How to Read Soil Test Results
1. Check the crop listed.
Recommendations depend on what you told the laboratory you plan to grow. A lawn, vegetable bed, blueberry patch, and Camellia sinensis row do not want identical conditions.
Tea generally prefers acidic, moist but well-drained soil. Lime that makes sense for a vegetable bed may be exactly the wrong move in a tea planting.
2. Read the pH before the fertilizer numbers.
Soil pH affects how easily plants can access nutrients.
Buffer pH is something different. It helps the laboratory calculate how much lime would be required to change an acidic soil. It is not the pH you are trying to reach.
3. Trust the rating more than the dramatic-looking number.
Low, medium, sufficient, high, and excessive ratings are based on regional research and expected crop response.
The number is an index of the soil’s nutrient-supplying capacity—not a literal inventory of every ounce of nutrient sitting underground waiting to be counted
4. Notice what’s missing.
Clemson’s standard soil test includes pH, buffer pH, extractable nutrients, lime recommendations, calculated cation exchange capacity, acidity, and base saturation.
Organic matter and nitrate nitrogen are separate tests.
Nitrogen changes form and moves through soil with water. That makes one nitrogen result especially difficult to treat as a permanent answer about what will be available later in the growing season.
5. Pair the report with field evidence.
Push a shovel into the ground. Watch how quickly water enters. Smell the soil. Look at root depth, crusting, compaction, earthworms, plant color, and how long moisture remains after rain.
USDA NRCS recommends combining chemical, physical, and biological indicators because no single measurement can define soil health.
Here at Clemson Tea Farm a tea row may test adequately for organic nutrients and still struggle because water sits around the roots. Another may look modest on paper but grow steadily because it drains well, stays covered, and supports active soil life.
Take a Sample That Means Something
A laboratory can only test what reaches the bag.
1. Separate different areas.
Sample areas separately when their crops, soil textures, fertilizer histories, or management practices differ.
2. Collect several subsamples.
For cultivated ground, Clemson recommends sampling 6–8 inches deep and combining soil from at least 12 locations within one uniform area.
3. Mix, air-dry, and label carefully.
Mix the subsamples in a clean plastic bucket, allow the soil to air-dry, and clearly identify each bag.
A handful scooped from the easiest corner is not a soil sample. It is a soil anecdote.
Compare future tests from the same areas, collected at similar depths and times of year. Then connect the trends with mulch, living roots, compost, and reduced disturbance, as described in Summer Soil Care: Keep It Covered.
Visual Teaching Moment: A Nursing Assessment for Soil
Think of the report this way:
pH: the vital sign
Nutrient ratings: the laboratory values
CEC: an estimate of nutrient-holding capacity
Structure and drainage: the physical assessment
Worms and roots: signs of living function
Plant growth: the follow-up visit
You would not assess a patient from one laboratory value.
Do not assess a field that way either.
Direction: A simple comparison graphic titled “Reading the Whole Soil Story,” pairing a soil test report with a shovel, roots, water infiltration, earthworms, and healthy plants.
Reflection
The report keeps us from guessing.
The farm keeps us from worshipping the report.
Good stewardship means testing before adding, observing before correcting, and remembering that healthy soil is more than a container with the right nutrient totals.
It is a living system that receives water, breathes, holds roots, cycles organic matter, and supports the plant from soil to leaf, harvest, brew, taste, and ritual.
A soil test is a useful chemical snapshot—not the whole story. Read the crop recommendation, correct only what needs correcting, and let field observation finish the diagnosis.
Wanna Bring More Farm-to-Cup Wellness Into Your Life?
Use our Clemson Tea Farm Soil Test Decoder Field Guide to pair laboratory results with what you can see, feel, and smell in the field.
Get notifications about tea classes, volunteer days, and WWOOF opportunities → Contact Clemson Tea Farm
Wanna Read More?
Wanna Geek Out?
#ClemsonTeaFarm #TeaLeavesAndLifeLessons #GardenToCup #SoilTesting #SoilHealth #CamelliaSinensis #RegenerativeGrowing #Zone7b #Zone8a
© 2026 Clemson Tea Farm. All rights reserved.
www.clemsonteafarm.com/disclaimers
